
Genesis Custom Blocks
https://developer.wpengine.com/genesis-custom-blocks/
PreviousCache Rocket (ok)NextHow to Use to registerBlockType() to Create Blocks in WordPress aaaaaaaa
Last updated
https://developer.wpengine.com/genesis-custom-blocks/
Last updated
After installing and activating the Genesis Custom Blocks plugin, the first step is to create the individual blocks you want to make available on the website.
In this article, well show you how to create a custom block, define its settings to make it easy to find and use in the WordPress editor, and create the template that’s required for properly displaying the block on your website.
Table of Contents
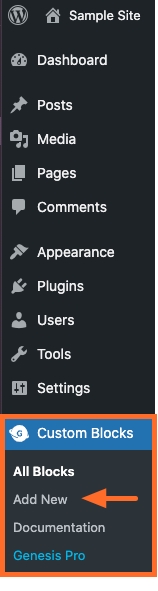
Go to Custom Blocks > Add New to create a new block.
Click image to enlarge
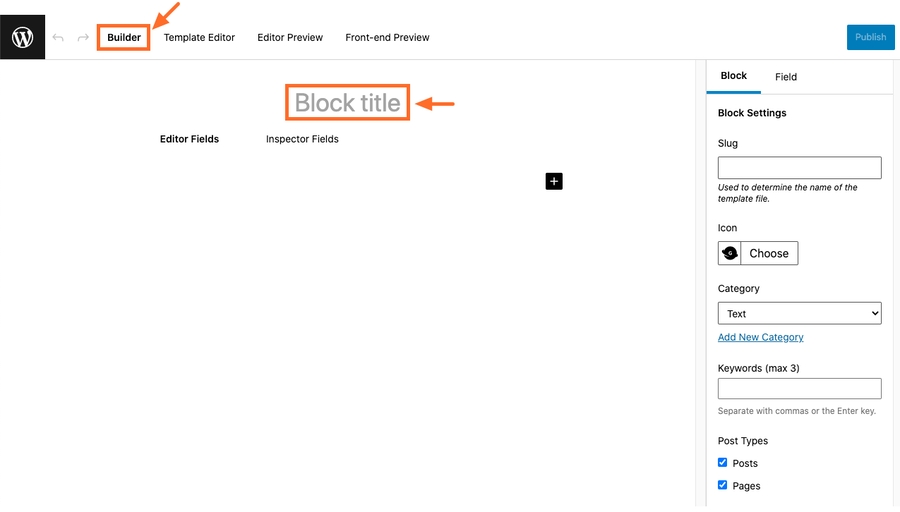
The Block Builder will opened by default.
To get started, enter a name for this block, as shown in the image below.
This name will be visible to site admins and editors so we recommend using a name that makes the intended use for this block clear. For example, if you are creating a custom button block, you might name the block Button.
Click image to enlarge
Click image to enlarge
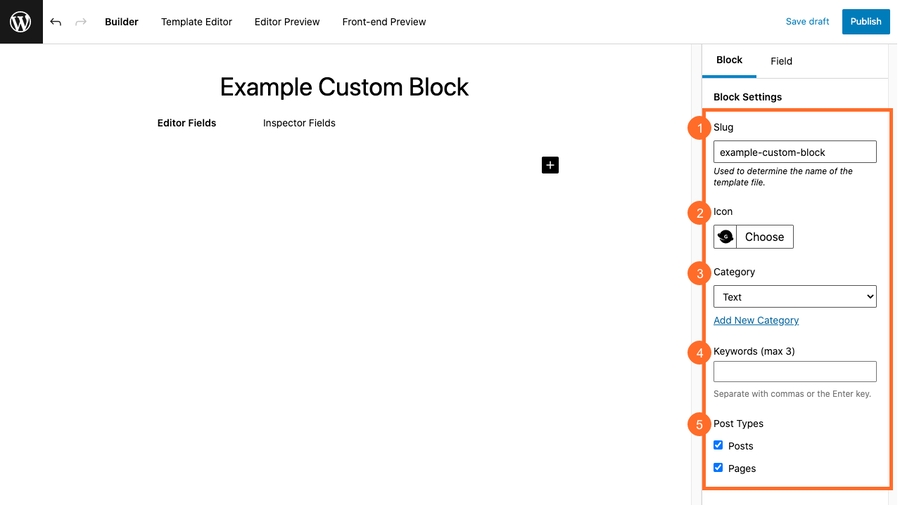
Slug: The slug will be auto-filled based on the name you give the block. This slug will be important later when creating a block template.
Icon: Choose an icon to represent this block. This icon will make it easier for users to find your block in the WordPress editor’s block selector.
Category: Click the arrow to choose from a list of default block categories or to add a custom category. When your end user clicks the plus icon to open the block library, the blocks they see will be separated into categories like Text, Media, Design, Widgets, etc. You can categorize your custom block using one of the built-in categories, or you can create a brand new category.
Keywords: Give your block some keywords (maximum of 3). Keywords make it easier for users to search for your block in the WordPress editor’s block selector.
Post Types: Check the box(es) to allow this block to be displayed on each post type. For example, if you uncheck Posts, the block won’t appear at all on any post.
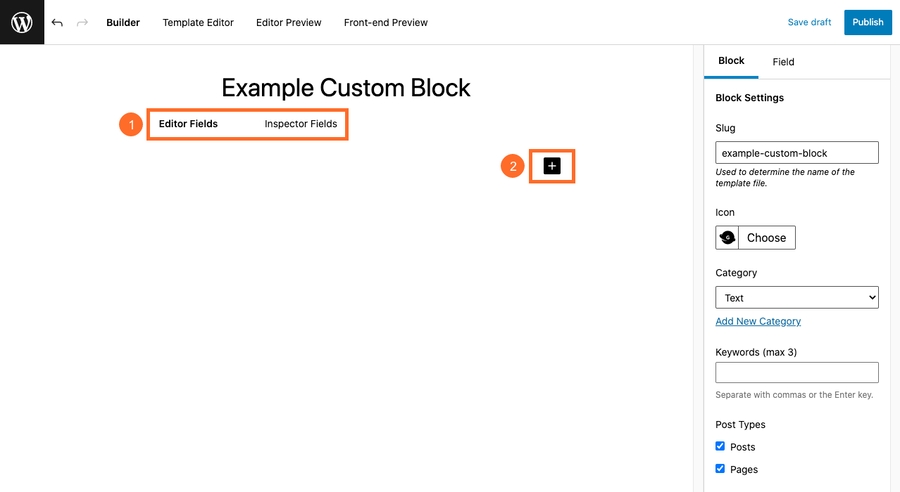
Block fields allow you to define the options that will be presented to users when adding your block to their post.
Fields are the points of data that can be different each time you use the block. For example, if you are creating a button block, you could include fields for the button’s text and link URL.
Click image to enlarge
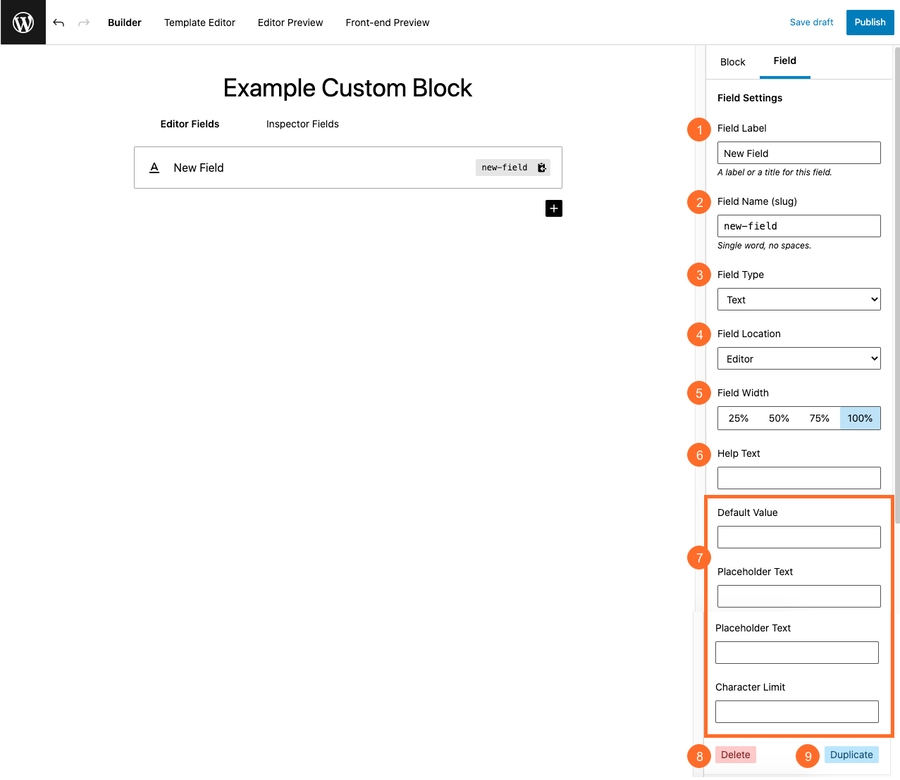
Field Location: Choose where you’d like to display this field.
Editor Fields will display the field in the main editing area of a post or page.
Inspector Fields will display the field in the right-hand sidebar under the block inspector.
Add Field: Click the plus sign to add a new field to the block.
Click image to enlarge
Field Label: Give your field a field label which will be displayed next to the input field when adding the block to the post.
Field Name (slug): The field name should auto-fill based on the field label, but can be customized. This will be used in the PHP as part of the block template.
Field Type: Choose the field type for the field. This is the type of input presented to the user when adding the block. Depending on the type, additional options will be available. Refer to the Field Types information for the various options and more details on each of them.
Field Location: Choose a location to display the field.
Editor will show the field in the main editing area of a post or page.
Inspector will display the field in the right-hand sidebar under the block inspector.
Field Width: Select how widely the field should be displayed.
Help Text: Enter some text to help users understand what information they should enter into the field when adding your block to their post.
The rest of the options will vary depending on the field type selected in #3 above. In the example above, we’re adding a Text field so the additional options shown in the image apply only to this text field (Default Value, Placeholder Text, and Character Limit). You can configure these options as desired.
Delete: If you change your mind, you can delete this field.
Duplicate: If you’d like to create an exact copy of this field, you can duplicate it.
Click image to enlarge
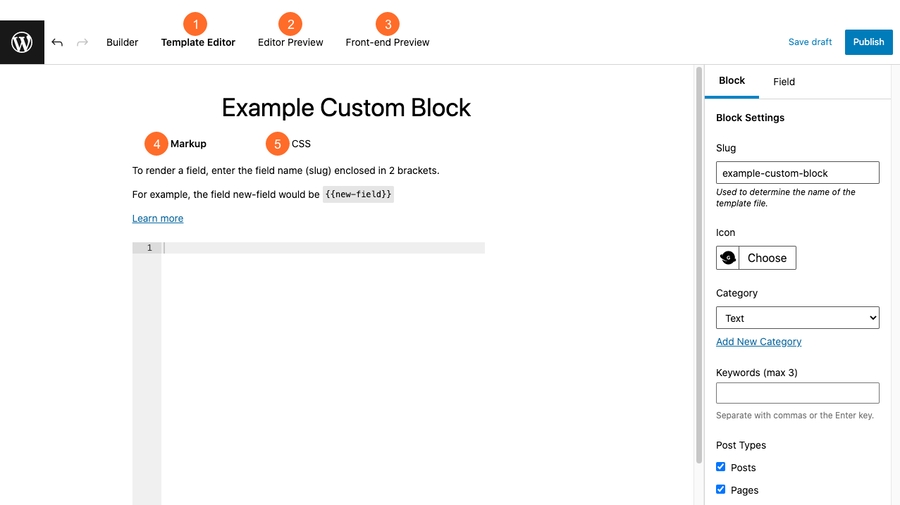
Template Editor: This is where you’ll create the required template. The template editor accepts HTML markup, field names (enclosed in 2 brackets), and CSS only. If you need to use logic, loop syntax, define variables, or use PHP, you can create the template manually using the PHP templating method instead. Also, if you’ve previously created custom blocks using the PHP templating method, they will continue to work as expected.
Editor Preview: The editor preview allows you to see what the block looks like on the backend (in other words, within the post or page editor).
Front-end Preview: The front-end preview allows you to see what the block looks like after data has been entered into the block fields on the backend. To see an updated front-end preview, enter data into the block and then save or publish it.
Markup: Enter the HTML you wish to use in the template. When adding a field to the markup, enclose the field’s slug in 2 brackets. For example: {{field-name}}. Also, we recommend including a wrapper in your template to support the Additional CSS Class(es) field that’s built into the WordPress block inspector (sidebar).
CSS: Click the CSS tab to enter any CSS you’d like to use to style the block. The CSS entered here will only be rendered on pages where the block is displayed so it won’t affect the overall performance of your website.
When you’re ready, click Publish to make your block available in the block library so it can be added to a post or page.
Click image to enlarge
Click image to enlarge
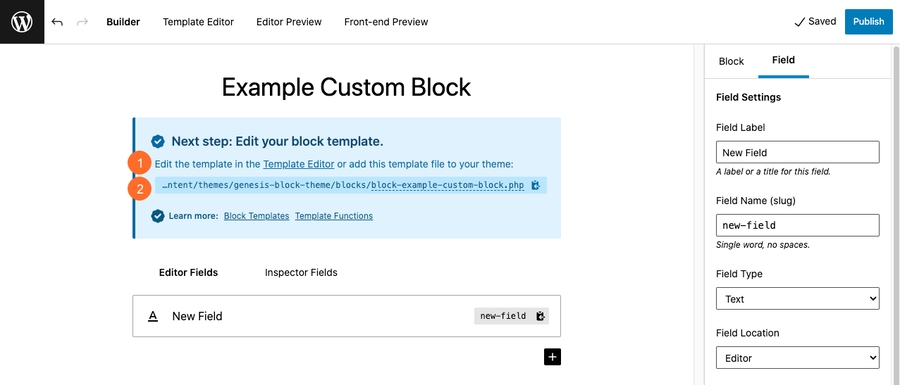
Here you’ll be given 2 options:
Edit the template using the Template Editor (as described in this article) or…
Create the template manually using the PHP templating method and add the template to your theme files.
Check out this example custom block to see how we used the block builder and template editor to create an example Ebook CTA block.
Next, you’ll configure the block’s settings which will help users find it easily within the WordPress block selector, as described below.
Now that you’ve used the Block Builder to create the block and configure the block and field settings, you’re ready to use the built-in Template Editor to create the required block template which allows the custom block to be properly displayed on your website.
If you save or publish a block without creating the template, you’ll be reminded that you need to create it, as shown in the image below.
